![]()
Reprint from THE "HOW-TO-DO-IT" BOOKSCARPENTRY FOR BOYS
|
I - II - III - IV - V - VI - VII - VIII - IX - X - XI - XII - XIII - XIV - XV - XVI - XVII - XVIII - XIX - XX - XXI
CHAPTER IX
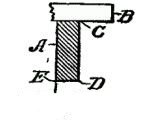
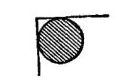
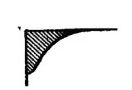
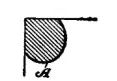
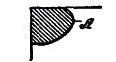
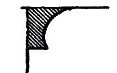
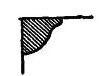
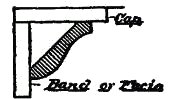
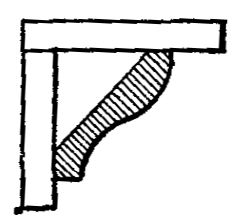
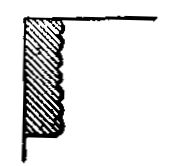
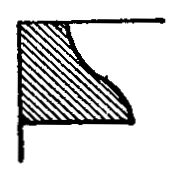
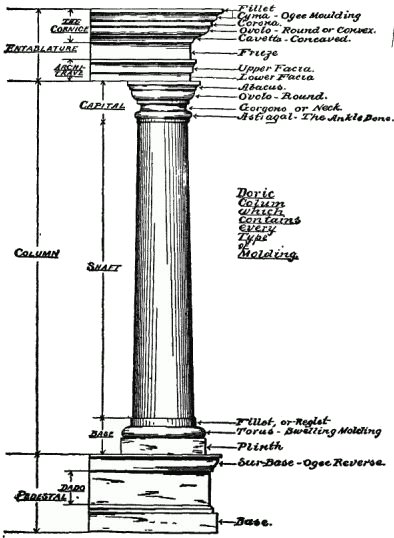
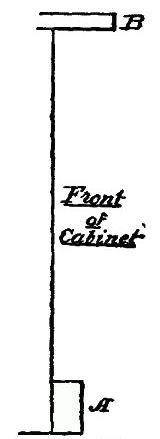
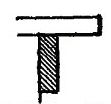
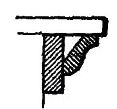
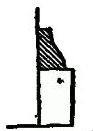
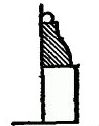
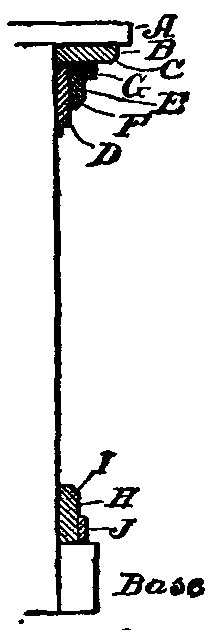
MOLDINGS, WITH PRACTICAL ILLUSTRATIONS IN EMBELLISHING WORKMoldings.—The use of moldings was early resorted to by the nations of antiquity, and we marvel to-day at many of the beautiful designs which the Phœnecians, the Greeks and the Romans produced. If you analyze the lines used you will be surprised to learn how few are the designs which go to make up the wonderful columns, spires, minarets and domes which are represented in the various types of architecture. The Basis of Moldings.—Suppose we take the base type of moldings, and see how simple they are and then, by using these forms, try to build up or ornament some article of furniture, as an example of their utility. The Simplest Molding.—In Fig. 185 we show a molding of the most elementary character known, being simply in the form of a band (A) placed below the cap. Such a molding gives to the article on which it is placed three distinct lines, C, D and E, If you stop to consider you will note that the molding, while it may add to the strength of the article, is primarily of service because the lines and surfaces produce shadows, and therefore become valuable in an artistic sense. The Astragal.—Fig. 186 shows the ankle-bone molding, technically called the Astragal. This form is round, and properly placed produces a good effect, as it throws the darkest shadow of any form of molding. The Cavetto.—Fig. 187 is the cavetto, or round type. Its proper use gives a delicate outline, but it is principally applied with some other form of molding. The Ovolo.—Fig. 188, called the ovolo, is a quarter round molding with the lobe (A) projecting downwardly. It is distinguished from the astragal because it casts less of a shadow above and below. The Torus.—Fig. 189, known as the torus, is a modified form of the ovolo, but the lobe (A) projects out horizontally instead of downwardly. The Apophyges (Pronounced apof-i-ges).—Fig. 190 is also called the scape, and is a concaved type of molding, being a hollowed curvature used on columns where its form causes a merging of the shaft with the fillet. The Cymatium.—Fig. 191 is the cymatium (derived from the word cyme), meaning wave-like. This form must be in two curves, one inwardly and one outwardly. The Ogee.—Fig. 192, called the ogee, is the most useful of all moldings, for two reasons: First, it may have the concaved surface uppermost, in which form it is called ogee recta—that is, right side up; or it may be inverted, as in Fig. 193, with the concaved surface below, and is then called ogee reversa. Contrast these two views and you will note what a difference the mere inversion of the strip makes in the appearance. Second, because the ogee has in it, in a combined form, the outlines of nearly all the other types. The only advantage there is in using the other types is because you may thereby build up and space your work better than by using only one simple form. You will notice that the ogee is somewhat like the cymatium, the difference being that the concaved part is not so pronounced as in the ogee, and the convexed portion bulges much further than in the ogee. It is capable of use with other moldings, and may be reversed with just as good effect as the ogee. The Reedy.—Fig. 194 represents the reedy, or the bead—that is, it is made up of reeds. It is a type of molding which should not be used with any other pronounced type of molding. The Casement (Fig. 195).—In this we have a form of molding used almost exclusively at the base of structures, such as columns, porticoes and like work. Now, before proceeding to use these moldings, let us examine a Roman-Doric column, one of the most famous types of architecture produced. We shall see how the ancients combined moldings to produce grace, lights and shadows and artistic effects. The Roman-Doric Column.—In Fig. 196 is shown a Roman-Doric column, in which the cymatium, the ovolo, cavetto, astragal and the ogee are used, together with the fillets, bases and caps, and it is interesting to study this because of its beautiful proportions. The pedestal and base are equal in vertical dimensions to the entablature and capital. The entablature is but slightly narrower than the pedestal; and the length of the column is, approximately, four times the height of the pedestal. The base of the shaft, while larger diametrically than the capital, is really shorter measured vertically. There is a reason for this. The eye must travel a greater distance to reach the upper end of the shaft, and is also at a greater angle to that part of the shaft, hence it appears shorter, while it is in reality longer. For this reason a capital must be longer or taller than the base of a shaft, and it is also smaller in diameter. It will be well to study the column not only on account of the wonderful blending of the various forms of moldings, but because it will impress you with a sense of proportions, and give you an idea of how simple lines may be employed to great advantage in all your work. Lessons from the Doric Column.—As an example, suppose we take a plain cabinet, and endeavor to embellish it with the types of molding described, and you will see to what elaboration the operation may be carried. Applying Molding.—Let Fig. 197 represent the front, top and bottom of our cabinet; and the first thing we shall do is to add a base (A) and a cap (B). Now, commencing at the top, suppose we utilize the simplest form of molding, the band. This we may make of any desired width, as shown in Fig. 198. On this band we can apply the ogee type (Fig. 199) right side up. But for variation we may decide to use the ogee reversed, as in Fig. 200. This will afford us something else to think about and will call upon our powers of initiative in order to finish off the lower margin or edge of the ogee reversa. If we take the ogee recta, as shown in Fig. 201, we may use the cavetto, or the ovolo (Fig. 202); but if we use the ogee reversa we must use a convex molding like the cavetto at one base, and [Pg 101] a convex molding, like the torus or the ovolo, at the other base. In the latter (Fig. 202) four different moldings are used with the ogee as the principal structure. Base Embellishments.—In like manner (Fig. 204) the base may have the casement type first attached in the corner, and then the ovolo, or the astragal added, as in Fig. 203. Straight-faced Moldings.—Now let us carry the principle still further, and, instead of using various type of moldings, we will employ nothing but straight strips of wood. This treatment will soon indicate to you that the true mechanic or artisan is he who can take advantage of whatever he finds at hand. Let us take the same cabinet front (Fig. 205), and below the cap (A) place a narrow strip (B), the lower corner of which has been chamfered off, as at C. Below the strip B is a thinner strip (D), vertically disposed, and about two-thirds its width. The lower corner of this is also chamfered, as at F. To finish, apply a small strip (G) in the corner, and you have an embellished top that has the appearance, from a short distance, of being made up of molding. Plain Molded Base.—The base may be treated in the same manner. The main strip (4) has its upper corner chamfered off, as at I, and on this is nailed a thin, narrow finishing strip (J). The upper part or molded top, in this case, has eleven distinct lines, and the base has six lines. By experimenting you may soon put together the most available kinds of molding strips. Diversified Uses.—For a great overhang you may use the cavetto, or the apophyges, and below that the astragal or the torus; and for the base the casement is the most serviceable molding, and it may be finished off with the ovolo or the cymatium. Pages of examples might be cited to show the variety and the diversification available with different types. Shadows Cast by Moldings.—Always bear in mind that a curved surface makes a blended shadow. A straight, flat or plain surface does not, and it is for that reason the concaved and the convexed surfaces, brought out by moldings, become so important. A little study and experimenting will soon teach you how a convex, a concave or a flat surface, and a corner or corners should be arranged relatively to each other; how much one should project beyond the other; and what the proportional widths of the different molding bands should be. An entire volume would scarcely exhaust this subject. Chapter 10, An Analysis of Tenoning, Mortising, Rabbeting and Beading |