![]()
Reprint from THE "HOW-TO-DO-IT" BOOKSCARPENTRY FOR BOYS
|
I - II - III - IV - V - VI - VII - VIII - IX - X - XI - XII - XIII - XIV - XV - XVI - XVII - XVIII - XIX - XX - XXI
CHAPTER X
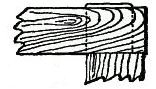
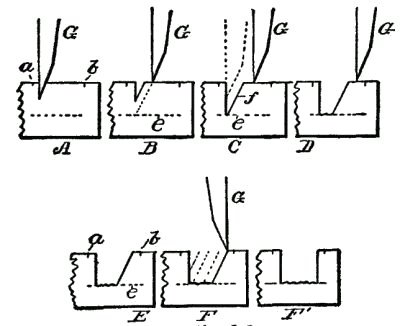
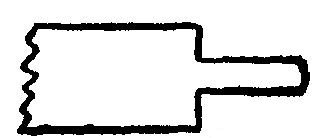
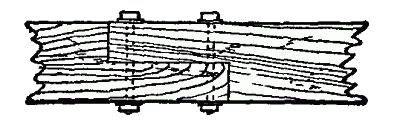
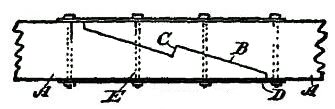
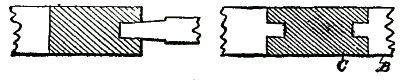
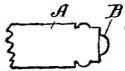
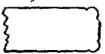
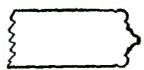
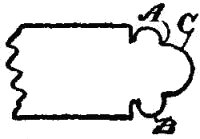
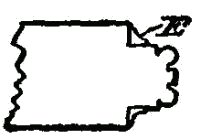
AN ANALYSIS OF TENONING, MORTISING, RABBETING AND BEADINGIn the chapter on How Work is Laid Out, an example was given of the particular manner pursued in laying out mortises and tenons, and also dovetailed work. I deem it advisable to add some details to the subject, as well as to direct attention to some features which do not properly belong to the laying out of work. Where Mortises Should Be Used.—Most important of all is a general idea of places and conditions under which mortises should be resorted to. There are four ways in which different members may be secured to each other. First, by mortises and tenons; second, by a lap-and-butt; third, by scarfing; and, fourth, by tonguing and grooving. Depth of Mortises.—When a certain article is to be made, the first consideration is, how the joint or joints shall be made. The general rule for using the tenon and mortise is where two parts are joined wherein the grains of the two members run at right angles to each other, as in the following figure. Rule for Mortises.—Fig. 206 shows such an example. You will notice this in doors particularly, as an example of work. The next consideration is, shall the mortises be cut entirely through the piece? This is answered by the query as to whether or not the end of the tenon will be exposed; and usually, if a smooth finish is required, the mortise should not go through the member. In a door, however, the tenons are exposed at the edges of the door, and are, therefore, seen, so that we must apply some other rule. The one universally adopted is, that where, as in a door stile, it is broad and comparatively thin, or where the member having the mortise in its edge is much thinner than its width, the mortise should go through from edge to edge. The reason for this lies in the inability to sink the mortises through the stile (A, Fig. 207) perfectly true, and usually the job is turned out something like the illustration shows. The side of the rail (B) must be straight with the side of the stile. If the work is done by machinery it results in accuracy unattainable in hand work. True Mortise Work.—The essense of good joining work is the ability to sink the chisel true with the side of the member. More uneven work is produced by haste than by inability. The tendency of all beginners is to strike the chisel too hard, in order the more quickly to get down to the bottom of the mortise. Hence, bad work follows. Steps in Cutting Mortises.—Examine Fig. 208, which, for convenience, gives six successive steps in making the mortise. The marks a, b designate the limits, or the length, of the mortise. The chisel (C) is not started at the marking line (A), but at least an eighth of an inch from it. The first cut, as at B, gives a starting point for the next cut or placement of the chisel. When the second cut (B) has thus been made, the chisel should be turned around, as in dotted line d, position C, thereby making a finish cut down to the bottom of the mortise, line e, so that when the fourth cut has been made along line f, we are ready for the fifth cut, position C; then the sixth cut, position D, which leaves the mortise as shown at E. Then turn the chisel to the position shown at F, and cut down the last end of the mortise square, as shown in G, and clean out the mortise well before making the finishing cuts on the marking lines (a, b). The particular reason for cleaning out the mortise before making the finish cuts is, that the corners of the mortise are used as fulcrums for the chisels, and the eighth of an inch stock still remaining protects the corners. Things to Avoid in Mortising.—You must be careful to refrain from undercutting as your chisel goes down at the lines a, b, because if you commit this error you will make a bad joint. As much care should be exercised in producing the tenon, although the most common error is apt to occur in making the shoulder. This should be a trifle undercut. Lap-and-Butt Joint.—The lap-and-butt is the form of uniting members which is most generally used to splice together timbers, where they join each other end to end. Bolts are used to secure the laps. But the lap-and-butt form is also used in doors and in other cabinet work. It is of great service in paneling. A rabbet is formed to receive the edge of the panel, and a molding is then secured to the other side on the panel, to hold the latter in place. Scarfing.—This method of securing members together is the most rigid, and when properly performed makes the joint the strongest part of the timber. Each member (A, Fig. 212) has a step diagonally cut (B), the two steps being on different planes, so they form a hook joint, as at C, and as each point or terminal has a blunt end, the members are so constructed as to withstand a longitudinal strain in either direction. The overlapping plates (D) and the bolts (E) hold the joint rigidly. The Tongue and Groove.—This form of uniting members has only a limited application. It is serviceable for floors, table tops, paneling, etc. In Fig. 213, a door panel is shown, and the door mullions (B) are also so secured to the rail (C). The tongue-and-groove method is never used by itself. It must always have some support or reinforcing means. Beading.—This part of the work pertains to surface finishings, and may or may not be used in connection with rabbeting. Figs. 214 and 215 show the simplest and most generally adopted forms in which it is made and used in connection with rabbeting, or with the tongue and groove. The bead is placed on one or both sides of that margin of the board (Fig. 214) which has the tongue, and the adjoining board has the usual flooring groove to butt against and receive the tongue. It is frequently the case that a blind bead, as in Fig. 215, runs through the middle of the board, so as to give the appearance of narrow strips when used for wainscoting, or for ceilings. The beads also serve to hide the joints of the boards. Ornamental Bead Finish.—These figures show how the bead may be used for finishing corners, edges and projections. Fig. 216 has a bead at each corner of a stile (A), and a finishing strip of half-round material (B) is nailed to the flat edge. Fig. 217 has simply the corners themselves beaded, and it makes a most serviceable finish for the edges of projecting members. Fig. 218, used for wider members, has the corners beaded and a fancy molding (C); or the reduced edge of the stile itself is rounded off. The Bead and Rabbet.—A more amplified form of work is available where the rabbet plane is used with the beader. These two planes together will, if properly used, offer a strong substitute for molding and molding effects. Fig. 219 has both sides first rabbeted, as at A, and the corners then beaded, as at B, with the reduced part of the member rounded off, as at C. Or, as in Fig. 220, the reduced edge of the member may have the corners beaded, as at D, and the rabbeted corners filled in with a round or concaved moulding (E). Shading with Beads and Rabbets.—You will see from the foregoing, that these embellishments are serviceable because they provide the article with a large number of angles and surfaces to cast lights and shadows; and for this reason the boy should strive to produce the effects which this class of work requires. Back to Table of Contents |