
KNOTS, SPLICES and ROPE WORK
| Parts of Rope. Whipping and Seizing Rope. Loops. Cuckolds'
Necks. Clinches. Overhand and Figure-eight Knots. Square and Reef Knots.
Granny Knots. Open-hand and Fishermen's Knots. Ordinary Knots and
Weavers' Knots. Garrick Bends and Hawser Hitches. Half-hitches. |
SIMPLE KNOTS AND BENDS
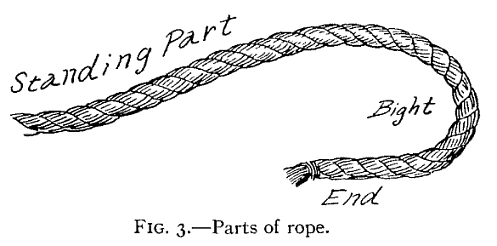
For convenience in handling rope and learning the various knots, ties,
and bends, we use the terms "standing part," "bight," and "end" (Fig.
3). The Standing Part is the principal portion or longest part of
the rope; the Bight is the part curved or bent while working or
handling; while the End is that part used in forming the knot or
hitch. Before commencing work the loose ends or strands of a rope
should be "whipped" or "seized" to prevent the rope from unravelling;
and although an expert can readily tie almost any knot, make a splice,
or in fact do pretty nearly anything with a loose-ended rope, yet it
is a wise plan to invariably whip the end of every rope, cable, or
hawser to be handled, while a marline-spike, fid, or pointed stick
will also prove of great help in working rope.
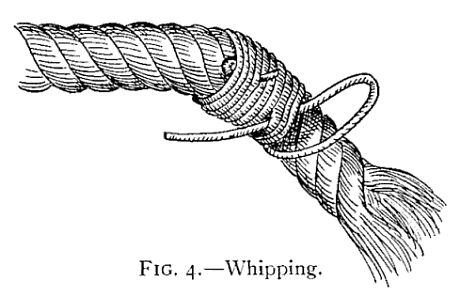
To whip or seize a rope-end, take a piece of twine or string and lay
it on the rope an inch or two from the end, pass the twine several
times around the rope, keeping the ends of the twine under the first
few turns to hold it in place; then make a large loop with the free
end of twine; bring it back to the rope and continue winding for three
or four turns around both rope and end of twine; and then finish by
drawing the loop tight by pulling on the free end (Fig. 4).
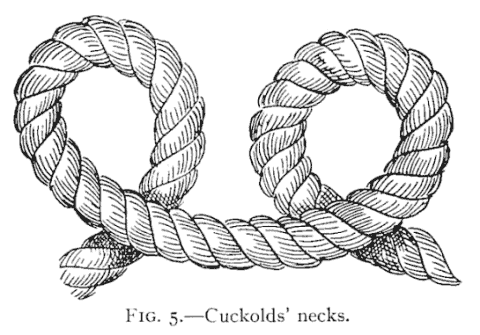
All knots are begun by "loops" or rings commonly known to mariners as
"Cuckolds' Necks" (Fig. 5).
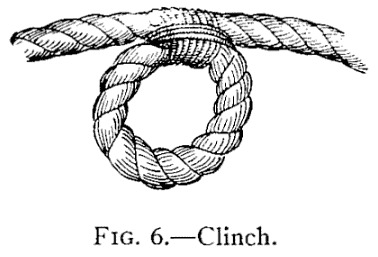
These may be either overhand or underhand,
and when a seizing or fastening of twine is placed around the two
parts where they cross a useful rope ring known as a "clinch" is
formed (Fig. 6).
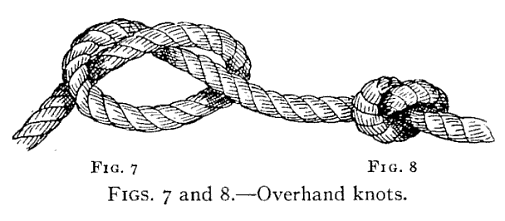
If the loose end of the rope is passed over the
standing part and through the "cuckold's-neck," the simplest of all
knots, known as the "Overhand Knot," is made (Fig. 7).
This drawn tight appears as in Fig. 8, and while so simple this knot is
important, as it is frequently used in fastening the ends of yarns and
strands in splicing, whipping, and seizing.
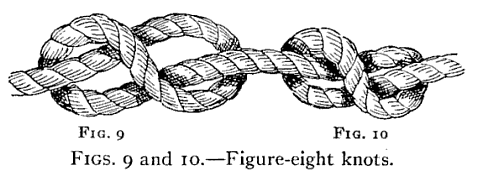
The "Figure-Eight Knot" is almost as simple as
the overhand and is plainly shown in Figs. 9 and 10.
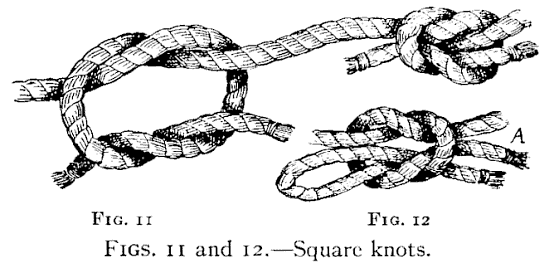
Only a step beyond the figure-eight and the overhand knots are the
"Square" and "Reefing" knots (Figs. 11 and 12). The square knot is
probably the most useful and widely used of any common knot and is the
best all-around knot known. It is very strong, never slips or becomes
jammed, and is readily untied. To make a square knot, take the ends of
the rope and pass the left end over and under the right end, then the
right over and under the left.
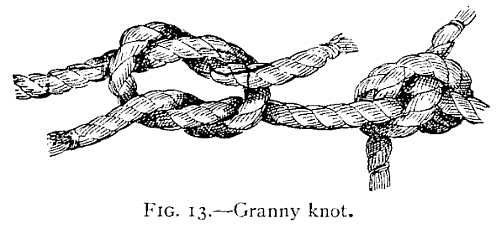
If you once learn the simple formula of
"Left over," "Right over," you will never make a mistake and form the
despised "Granny," a most useless, bothersome, and deceptive makeshift
for any purpose (Fig. 13). The true "Reef Knot" is merely the square
knot with the bight of the left or right end used instead of the end
itself. This enables the knot to be "cast off" more readily than the
regular square knot (A, Fig. 12).
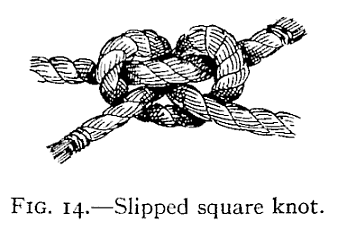
Neither square nor reef knots, however, are reliable when tying two ropes
of unequal size together, for under such conditions they will frequently slip
and appear as in Fig. 14, and sooner or later will pull apart.

To prevent this the ends may be tied or seized as shown in Fig. 15.

A better way to join two ropes of unequal diameter is to use the "Open-hand Knot."
This knot is shown in Fig. 16, and is very quickly and easily made; it never slips
or gives, but is rather large and clumsy, and if too great a strain
is put on the rope it is more likely to break at the knot than at any other spot.
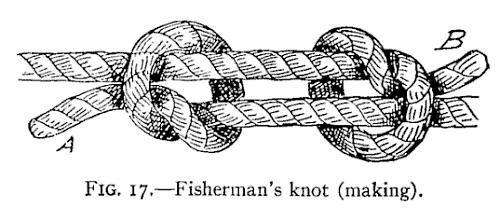
The "Fisherman's Knot," shown in Fig. 17, is a good knot
and is formed by two simple overhand knots slipped over each rope, and
when drawn taut appears as in Fig. 18.
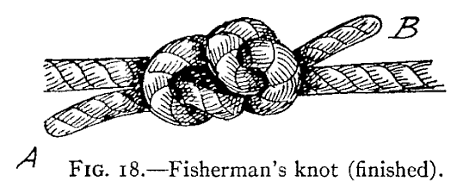
This is an important and valuable knot for anglers, as the two lines may be drawn apart
by taking hold of the ends, A, B, and a third line for a sinker, or
extra hook, may be inserted between them. In joining gut lines the
knot should be left slightly open and the space between wrapped with
silk. This is probably the strongest known method of fastening fine lines.

The "Ordinary Knot," for fastening heavy ropes, is shown in Fig. 19.
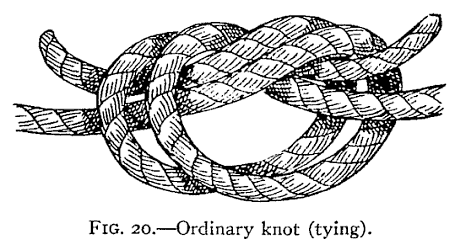
It is made by forming a simple knot and then interlacing the other
rope or "following around," as shown in Fig. 20. This knot is very
strong, will not slip, is easy to make, and does not strain the
fibres of the rope. Moreover, ropes joined with this knot will pay
out, or hang, in a straight line.
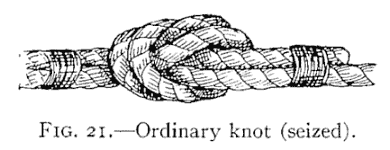
By whipping the ends to the standing parts it becomes a neat and handsome knot (Fig. 21).
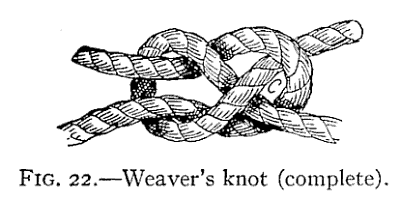
The "Weaver's Knot" (Fig. 22) is more useful in joining small lines, or twine,
than for rope, and for thread it is without doubt the best knot known.
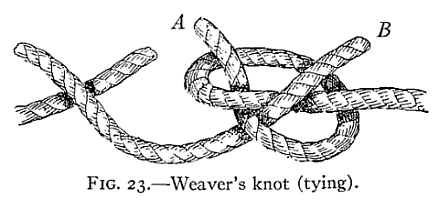
The ends are crossed as in Fig. 23. The end A is then looped back over
the end B, and the end B is slipped through loop C and
drawn tight.
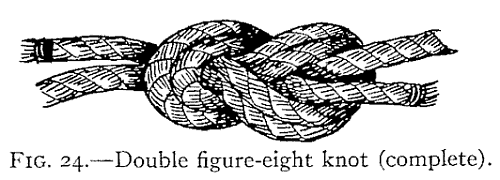
Another useful and handsome knot is illustrated in Fig. 24. This is a
variation of the figure-eight knot, already described, and is used
where there is too much rope, or where a simple knot is desired to
prevent the rope running through an eye, ring, or tackle-block.

It is made by forming a regular figure eight and then "following round" with
the other rope as in Fig. 25. It is then drawn taut and the ends
seized to the standing part if desired.
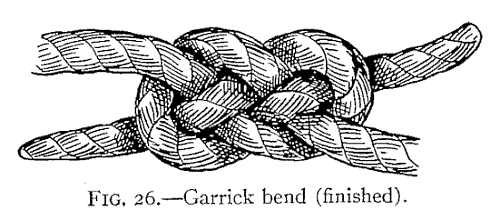
Sometimes we have occasion to join two heavy or stiff ropes or
hawsers, and for this purpose the "Garrick Bend" (Fig. 26) is
preeminently the best of all knots. To make this knot, form a bight by
laying the end of a rope on top of and across the standing part.
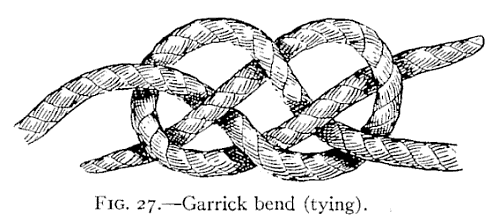
Next take the end of the other rope and pass it through this bight, first
down, then up, over the cross and down through the bight again, so
that it comes out on the opposite side from the other end, thus
bringing one end on top and the other below, as illustrated in Fig.
27. If the lines are very stiff or heavy the knot may be secured by
seizing the ends to the standing parts.
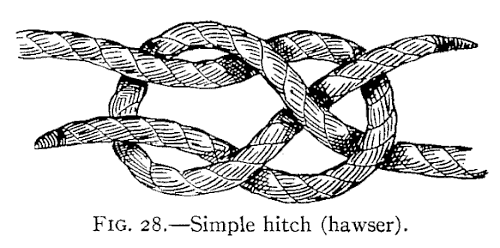
A much simpler and a far poorer knot is sometimes used in fastening two
heavy ropes together. This is a simple hitch within a loop, as illustrated in Fig. 28,
but while it has the advantage of being quickly and easily tied it is so
inferior to the Garrick bend that I advise all to adopt the latter in its place.
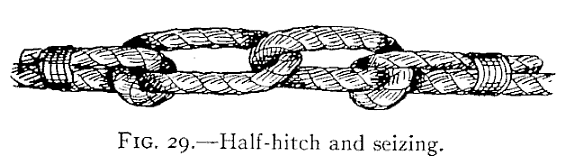
When two heavy lines are to be fastened for any considerable time, a
good method is to use the "Half-hitch and Seizing," shown in Fig. 29.
This is a secure and easy method of fastening ropes together and it
allows the rope to be handled more easily, and to pass around a winch
or to be coiled much more readily, than when other knots are used.