KNOTS, SPLICES and ROPE WORK
| Two-, Three-, and Fivefold Shortenings. Single Plaits and Monkey
Chain. Twist Braids and Braiding Leather. Open Chains. Seized and Bow
Shortenings. Sheepshanks and Dogshanks. Grommets. Selvagee Straps and
Selvagee Boards. Flemish and Artificial Eyes. Throat Seizings. Lashed Splices. |
SHORTENINGS, GROMMETS, AND SELVAGEES
In many cases a rope may prove too long for our use or the free ends
may be awkward, or in the way. At such times a knowledge of
"shortenings" is valuable. There are quite a variety of these useful
knots, nearly all of which are rather handsome and ornamental, in fact
a number of them are in constant use aboard ship merely for ornament.
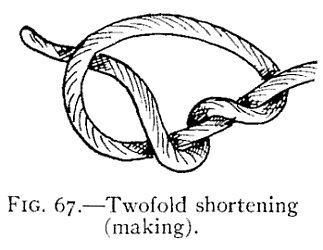
The simplest form of shortening, shown in Fig. 67, is a variation of
the common and simple overhand knot already described and illustrated.
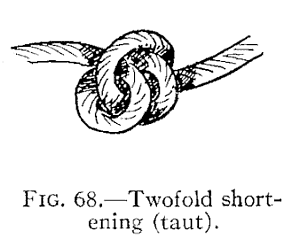
These knots are formed by passing the end of a rope twice or more
times through the loop of the simple knot and then drawing it tight
(Fig. 68). They are known as "Double," "Treble,"
"Fourfold," or "Sixfold" knots and are used to prevent
a rope from passing through a ring or block as well as for shortening.

All gradations from the double to the sixfold are shown in Fig. 69, both in process
of making and as they appear when drawn taut.
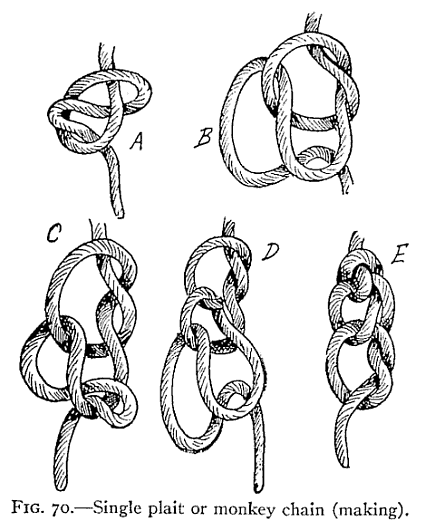
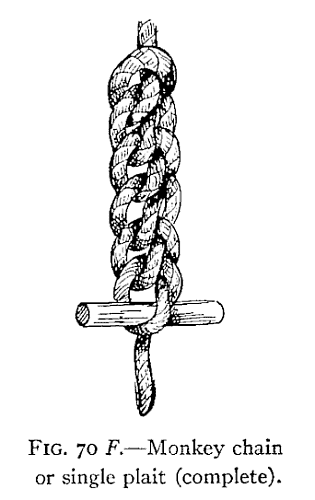
Another very simple form of shortening is shown in Fig. 70
and is known as the "Single Plait," or "Chain Knot."
To make this shortening, make a running loop (A, Fig.
70), then draw a bight of the rope through this loop, as shown at B,
draw another bight through this, as at C to D, and continue in
this way until the rope is shortened to the desired length; the free
end should then be fastened by passing a bit of stick through the last
loop, F, or by running the free end through the last loop, as at
E.
To undo this shortening, it is only necessary to slip out the
free end, or the bit of wood, and pull on the end, when the entire
knot will quickly unravel.
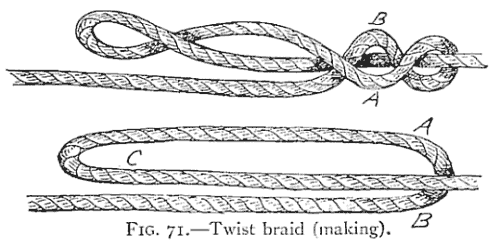
The "Twist," or "Double Chain," is made in
a similar manner but is commenced In a different way (A, Fig. 71).
It may also be made with three separate pieces of line, as shown in
B, Fig. 71.
Hold the double loop in the left hand; the part A is
then brought over B; with a half turn B is crossed over to A,
and then proceed as in the ordinary three-strand plait until the end
of loop is reached, when the loose end is fastened by passing through
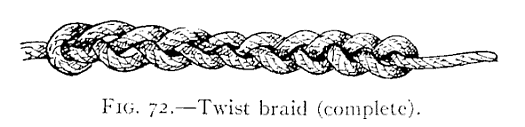
the bight and the completed shortening appears as in Fig. 72.
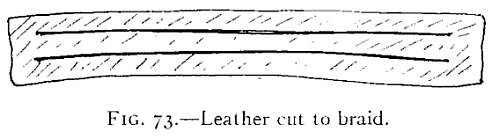
This same process is often used by Mexicans and Westerners in making
bridles, headstalls, etc., of leather. The leather to be used is slit
lengthwise from near one end to near the other, as shown in Fig. 73,
and the braid is formed as described.
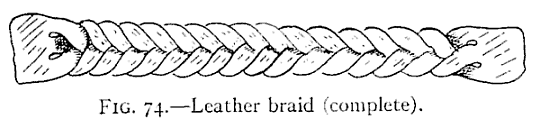
The result appears as in Fig.
74, and in this way the ends of the leather strap remain uncut, and
thus much stronger and neater than they would be were three separate
strips used.
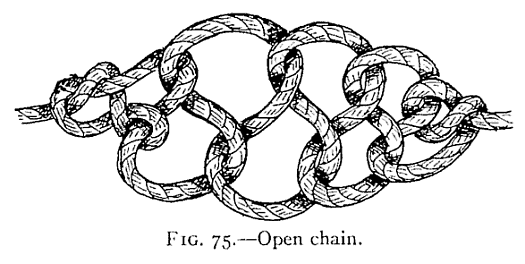
Another handsome knot for shortening is the more highly ornamental
"Open Chain" (Fig. 75). Make the first loop of the rope secure by a
twist of the rope and then pass the loose end through the preceding
loop, to right and left alternately, until the knot is complete.
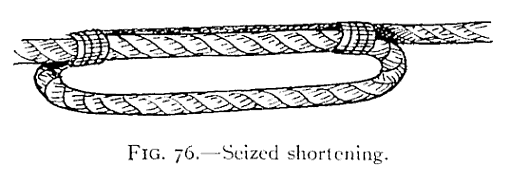
The simplest of all shortenings consists of a loop taken in the rope
with the bights seized to the standing part (Fig. 76). This is
particularly well adapted to heavy rope or where a shortening must be
made quickly.
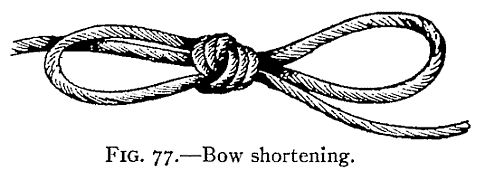
Fig. 77 shows another very simple shortening, which
requires no description. This will not withstand a very great strain
but is secure from untying by accident and is very useful for taking
up spare rope of lashings on bundles or baggage.
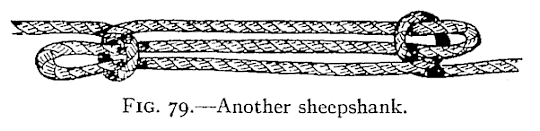
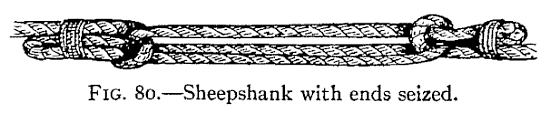
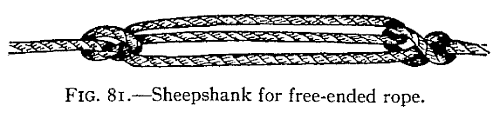
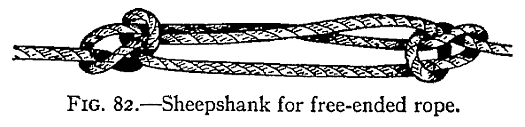
"Sheepshanks," or
"Dogshanks," are widely used for shortening rope, especially where
both ends are fast, as they can be readily made in the centre of a
tied rope. There are several forms of these useful knots.
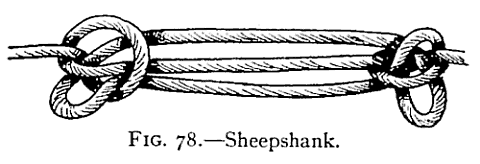
The best and most secure form is shown in Fig. 78. A simple running knot is first
made; a bend is pushed through the loop, which is then drawn taut; the
other end of the bend is fastened in a similar manner and the
shortening is complete.
Grommets are round, endless rings of rope useful in a myriad ways
aboard ship as well as ashore. They are often used as handles for
chests, for rings with which to play quoits, to lengthen rope, and in
many similar ways. The grommet is formed of a single strand of rope
five times as long as the circumference of the grommet when
complete.
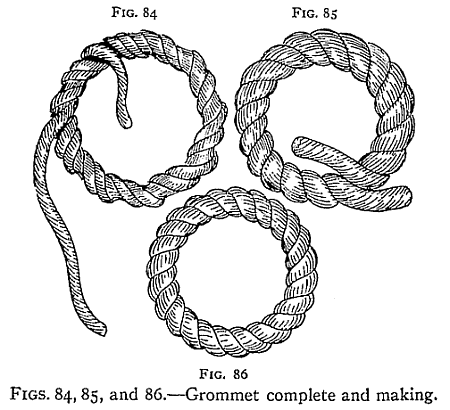
Take the strand and lay one end across the other at the
size of loop required and with the long end follow the grooves or
"lay" of the strand until back to where you started (Fig. 84), thus
forming a two-stranded ring. Then continue twisting the free end
between the turns already made until the three-strand ring is complete
(Fig. 85). Now finish and secure the ends by making overhand knots,
pass the ends underneath the nearest strands and trim ends off close
(Fig. 86). If care is taken and you remember to keep a strong twist on
the strand while "laying up" the grommet, the finished ring will be as
firm and smooth and endless as the original rope.
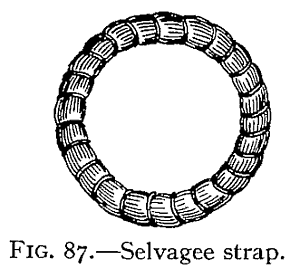
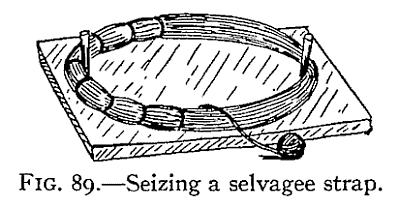
A "Sevagee" or "Selvagee" strap is
another kind of ring (Fig. 87).
This is made by passing a number of strands or yarns around pins or
nails set in a board (Fig. 88), and binding the whole together with a
seizing of yarn or marline (Fig. 89). These are strong, durable straps
much used for blocks aboard ship, for handles to boxes and chests, and
in many similar ways.
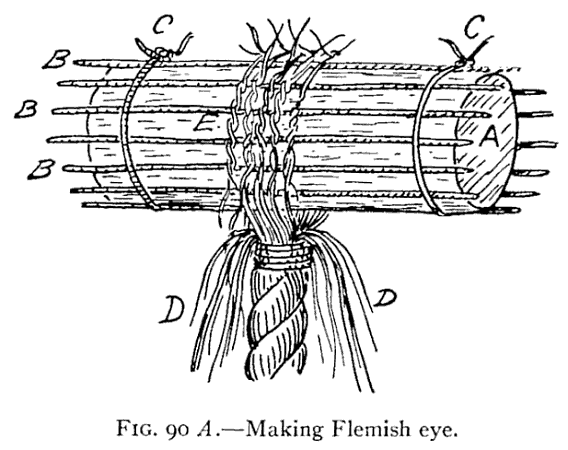
A "Flemish Eye" (Fig. 90) is an eye made in a
manner much like that employed in forming the selvagee strap. Take a
spar or piece of wood the size of the intended eye A. Around this
wood lay a number of pieces of yarn or marline, B, B, B, and fasten
them by tying with twine as at C. Whip the piece of rope in which
eye is to be formed and unravel and open out the strands as at D.
Lap the yarns over the wood and the stops B, and fasten together by
overhand knots E, worm the free ends under and over and then bring
up the ends of the stops B and tie around the strands of eye as
shown.
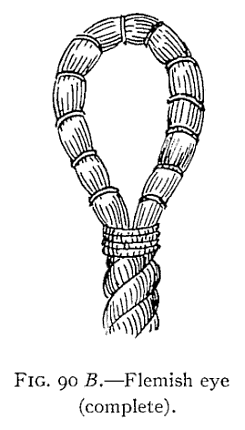
The eye may be finished neatly by whipping all around with yarn
or marline, and will then appear as in Fig. 90 B.
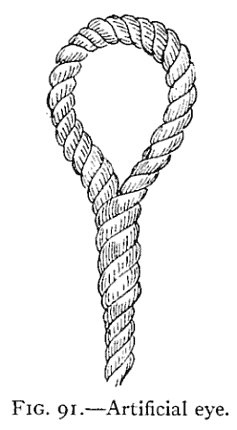
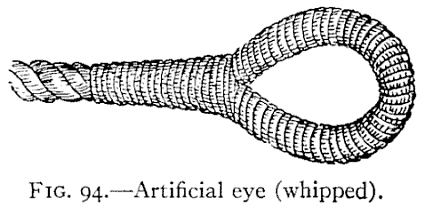
An "Artificial Eye" (Fig. 91) is still another form of eye
which will be found useful and in some ways easier and quicker to
make than a spliced eye, besides being stronger.

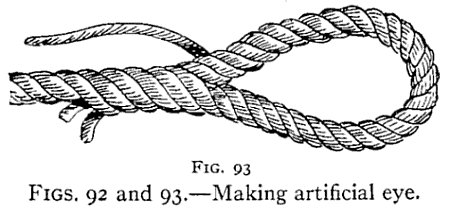
Take the end of a rope and unlay one strand; place the two remaining
strands back alongside of the standing part (Fig. 92). Pass the loose
strand which has been unlaid over the end, and follow around the
spaces between the two strands and then around eye,—as in making a
grommet,—until it returns down the standing part and lies under the
eye with the strands (Fig. 93). Then divide the strands, taper them
down, and whip the whole with yarn or marline (Fig. 94).
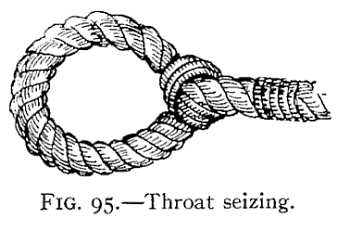
Still another eye which at times will be useful is the "Throat
Seizing," shown in Fig. 95. This is made by opening the end slightly
and lashing it to the standing part as shown. Another ring sometimes
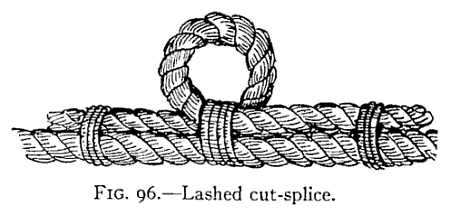
used is illustrated in Fig. 96, and is easily and quickly made by
lashing the two ends of a short rope to the standing part of another.
Cuckolds' necks with lashings or "Clinches" are also used for the same
purpose.